Bonding is a very powerful ability, mostly because you can take an additional turn for the same Order Marker (or the same turn if you opt not to use Order Markers). But it also allows you to apply extra force onto your opponents that you normally wouldn't be able to apply. Or you can use that force to split up your units so you can get board advantage. So, in a way, Bonding becomes similar to a game of All or Nothing. Of course, any turn where you accomplish something that's beneficial to you isn't nothing, but it may be beneficial to use your 3rd Order Marker on a loss of initiative for Bonding powers and to gain ground. In this scenario, attacking with an buttload of units isn't always as important as getting ready for the next round. What more does a weakened group of enemy units want to see than a fresh group of soldiers ready to pounce?
Of course, Bonding powers can also irritate custom creators to no end. Chain Bonding! If you can get 3 units to take a turn and they weren't designed to, then that's where Chain Bonding comes into play. And believe me, as there is no precedent, its quite difficult to use power wording to define how a unit does not use Chain Bonding.
Now then, on to another topic...Glyphs!
Love 'em or hate 'em, they exist. Recently, I've been digging more into my own particular glyph pool (which I will discuss later), and found this excellent thread on heroscapers regarding one persons opinions about how to construct a glyph pool
Now then, onto my typical glyph pool!
In general, I have 2 or 4 glyphs on the table, facedown. Occasionally, I'll flip them faceup before or after picking armies. It really can ramp up what gets played and what gets left out.
Glyph of Astrid (Attack+1):
Both Crevcor and Ulvania seem too weak to me. Neither really scream out "Keep me defended" like a glyph that costs 180 points less then Taelord.
Glyph of Brandar (Artifact):
I use this one for myriad effects, including but not limited too: blowing up a Line of Site blocker (i.e. Ruins), Choice glyph, a dud that disappears when activated, and as an additional Proftaka.
Glyph of Dagmar (Initiative +8):
Perfect when trying to pull off initiative switches and even better, just trying to overwhelm your opponent. Just don't let that speed go to your head.
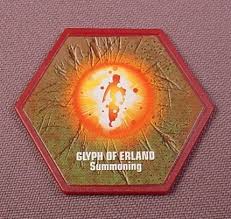
Glyph of Erland (Summoning):
Sometimes you just want to attract a unit to instant death. Or maybe you could use it to bring in an Anubian Wolf and hope to roll well at the right time. It's a cool glyph, and there are occasions where I like to place 2 in my pool.
Glyph of Gerda (Defense+1):
Nice to have, but unlike Astrid, it doesn't become a kingpin piece of the board. And that's the way I like it.
Glyph of Mitonsoul (Massive Curse):
For me, there is little more thrilling than seeing this one make its rounds. As the units just barely manage to shrug off the curse, I wounder what they think when their pal evaporates off the map? Plus, it really helps to add an aggressive playstyle in the event you lose a hero. Which is very nasty if your trying to defend something.
Glyph of Nilrend (Negation):
A fun glyph with a neat effect. As heroes get played quite heavily over here, this one is often found in my pool. It's great for negating problematic units too, or if you get it early, you can eliminate a unit you think your opponent is sending in first. Namely, Cyprien.
Glyph of Proftaka (Trap Hole):
Sure it has little effect on the game, but there always needs to be some risk.
Glyph of Valda (Move+2):
This one is only my pool half of the time. I think that it is a great tool, and really adds tension to the area located around it. But unless the map is smaller or at least somewhat compact, this one won't see light.
Glyph of Wannok (Wound):
Have some fun with middle of the rounds. That is all.
As far as the ones I don't use in the pool (but do own), here are my cuts:
Glyph of Crevcor/Ulvania (Varied Attack+1):
Neither really add the level of tension that I would hope for in a powerful glyph. Ulvania did get used, but as Squads often made up the other half of my army, it wasn't so useful.
Glyph of Ivor (Range+4):
Although I do like gun-wielding units, they are relatively overpowered as is and kiting just makes that worse. On dinky maps however, there is a chance Ivor will be drawn.
Glpyh of Kelda (Healing):
Originally, I did have this one in my pool, but the rules say it cannot be facedown. It sees "faceup glyphs" play when I do use them however.
Glyph of Oreld (Intercept Order):
Kind of a snore inducing glyph for me. You just gotta get lucky I suppose.
Glyph of Rannvieg (Wind):
It negates Flying. Sorry, I'm not seeing how it is as desirable as one could think. I tried it recently, but like anything else it hasn't grown on me. I might add it later on though, as it helps with the Risk/Reward system I've got with my pool.
Glyph of Sturla (Revive):
Nope! You let your figure get killed. Shame on you, you get no second chance. Plus, it's way overpowered with Slavi'Vaen. Can you imagine reviving Sgt. Drake Alexander or Cyprien Esenwein with the use of 3 Time Counters? Bad news.
Glyph of Thorian (Thorian Speed):
Make everyone like Drake! Nah, its useful for set scenarios where guns are a huge factor(for example the Swarm of the Marro Campaign), but otherwise, I'll let it be. It doesn't influence aggression or Risk/Reward enough either.
I hope everyone enjoys the rest of their days. Keep on, keepin' on!
Of course, Bonding powers can also irritate custom creators to no end. Chain Bonding! If you can get 3 units to take a turn and they weren't designed to, then that's where Chain Bonding comes into play. And believe me, as there is no precedent, its quite difficult to use power wording to define how a unit does not use Chain Bonding.
Now then, on to another topic...Glyphs!
Love 'em or hate 'em, they exist. Recently, I've been digging more into my own particular glyph pool (which I will discuss later), and found this excellent thread on heroscapers regarding one persons opinions about how to construct a glyph pool
Now then, onto my typical glyph pool!
In general, I have 2 or 4 glyphs on the table, facedown. Occasionally, I'll flip them faceup before or after picking armies. It really can ramp up what gets played and what gets left out.
Glyph of Astrid (Attack+1):
Both Crevcor and Ulvania seem too weak to me. Neither really scream out "Keep me defended" like a glyph that costs 180 points less then Taelord.
Glyph of Brandar (Artifact):
I use this one for myriad effects, including but not limited too: blowing up a Line of Site blocker (i.e. Ruins), Choice glyph, a dud that disappears when activated, and as an additional Proftaka.
Glyph of Dagmar (Initiative +8):
Perfect when trying to pull off initiative switches and even better, just trying to overwhelm your opponent. Just don't let that speed go to your head.
Glyph of Erland (Summoning):
Sometimes you just want to attract a unit to instant death. Or maybe you could use it to bring in an Anubian Wolf and hope to roll well at the right time. It's a cool glyph, and there are occasions where I like to place 2 in my pool.
Glyph of Gerda (Defense+1):
Nice to have, but unlike Astrid, it doesn't become a kingpin piece of the board. And that's the way I like it.
Glyph of Mitonsoul (Massive Curse):
For me, there is little more thrilling than seeing this one make its rounds. As the units just barely manage to shrug off the curse, I wounder what they think when their pal evaporates off the map? Plus, it really helps to add an aggressive playstyle in the event you lose a hero. Which is very nasty if your trying to defend something.
Glyph of Nilrend (Negation):
A fun glyph with a neat effect. As heroes get played quite heavily over here, this one is often found in my pool. It's great for negating problematic units too, or if you get it early, you can eliminate a unit you think your opponent is sending in first. Namely, Cyprien.
Glyph of Proftaka (Trap Hole):
Sure it has little effect on the game, but there always needs to be some risk.
Glyph of Valda (Move+2):
This one is only my pool half of the time. I think that it is a great tool, and really adds tension to the area located around it. But unless the map is smaller or at least somewhat compact, this one won't see light.
Glyph of Wannok (Wound):
Have some fun with middle of the rounds. That is all.
As far as the ones I don't use in the pool (but do own), here are my cuts:
Glyph of Crevcor/Ulvania (Varied Attack+1):
Neither really add the level of tension that I would hope for in a powerful glyph. Ulvania did get used, but as Squads often made up the other half of my army, it wasn't so useful.
Glyph of Ivor (Range+4):
Although I do like gun-wielding units, they are relatively overpowered as is and kiting just makes that worse. On dinky maps however, there is a chance Ivor will be drawn.
Glpyh of Kelda (Healing):
Originally, I did have this one in my pool, but the rules say it cannot be facedown. It sees "faceup glyphs" play when I do use them however.
Glyph of Oreld (Intercept Order):
Kind of a snore inducing glyph for me. You just gotta get lucky I suppose.
Glyph of Rannvieg (Wind):
It negates Flying. Sorry, I'm not seeing how it is as desirable as one could think. I tried it recently, but like anything else it hasn't grown on me. I might add it later on though, as it helps with the Risk/Reward system I've got with my pool.
Glyph of Sturla (Revive):
Nope! You let your figure get killed. Shame on you, you get no second chance. Plus, it's way overpowered with Slavi'Vaen. Can you imagine reviving Sgt. Drake Alexander or Cyprien Esenwein with the use of 3 Time Counters? Bad news.
Glyph of Thorian (Thorian Speed):
Make everyone like Drake! Nah, its useful for set scenarios where guns are a huge factor(for example the Swarm of the Marro Campaign), but otherwise, I'll let it be. It doesn't influence aggression or Risk/Reward enough either.
I hope everyone enjoys the rest of their days. Keep on, keepin' on!
No comments:
Post a Comment